Database connection pooling with Amazon RDS Proxy

What is database connection pooling?
Database pooling is a technique to reduce the opening and closing of connections by maintaining a set of open connections that can be passed among database operations. As a result, the connection overhead is spread across several client requests.
Why use Amazon RDS Proxy?
Opening multiple connections is expensive. Establishing a connection includes DNS lookup to locate the server IP address, handshakes to establish a TCP connection, encryption, validating credentials, and more. In addition, all the established connections will consume some CPU to be maintained.
Amazon RDS Proxy allows applications to pool and share database connections to improve scalability.
Enables application resilience by automatically connecting to a standby Database instance when there is a failure while preserving the established connections.
Additional security as you can enforce AWS Identity and Access Management authentication for databases and securely store the credentials in AWS Secrets Manager.
Queues or throttles application connections that can’t be served immediately from the pool, thus can keep your application running in a degraded state.
Compare a database instance’s performance before and after implementing RDS Proxy
Now let’s see RDS Proxy in action. We want to see how the instance behaves with and without RDS Proxy. Here are the steps we are going to conduct:
Create a db.t3.medium RDS instance. We want at least a t3 so we can leverage Performance Insights for comparisons
Create a Cloud9 environment to run load tests for our database instance.
Import a test database from https://github.com/datacharmer/test_db. Otherwise you could use your own simple schema since we will just be testing connections.
Run mysqlslap commands to emulate database connections using the DNS endpoint for our database instance
Create Amazon RDS Proxy
Run the same mysqlslap commands using the RDS Proxy endpoint as host
Create Amazon RDS instance
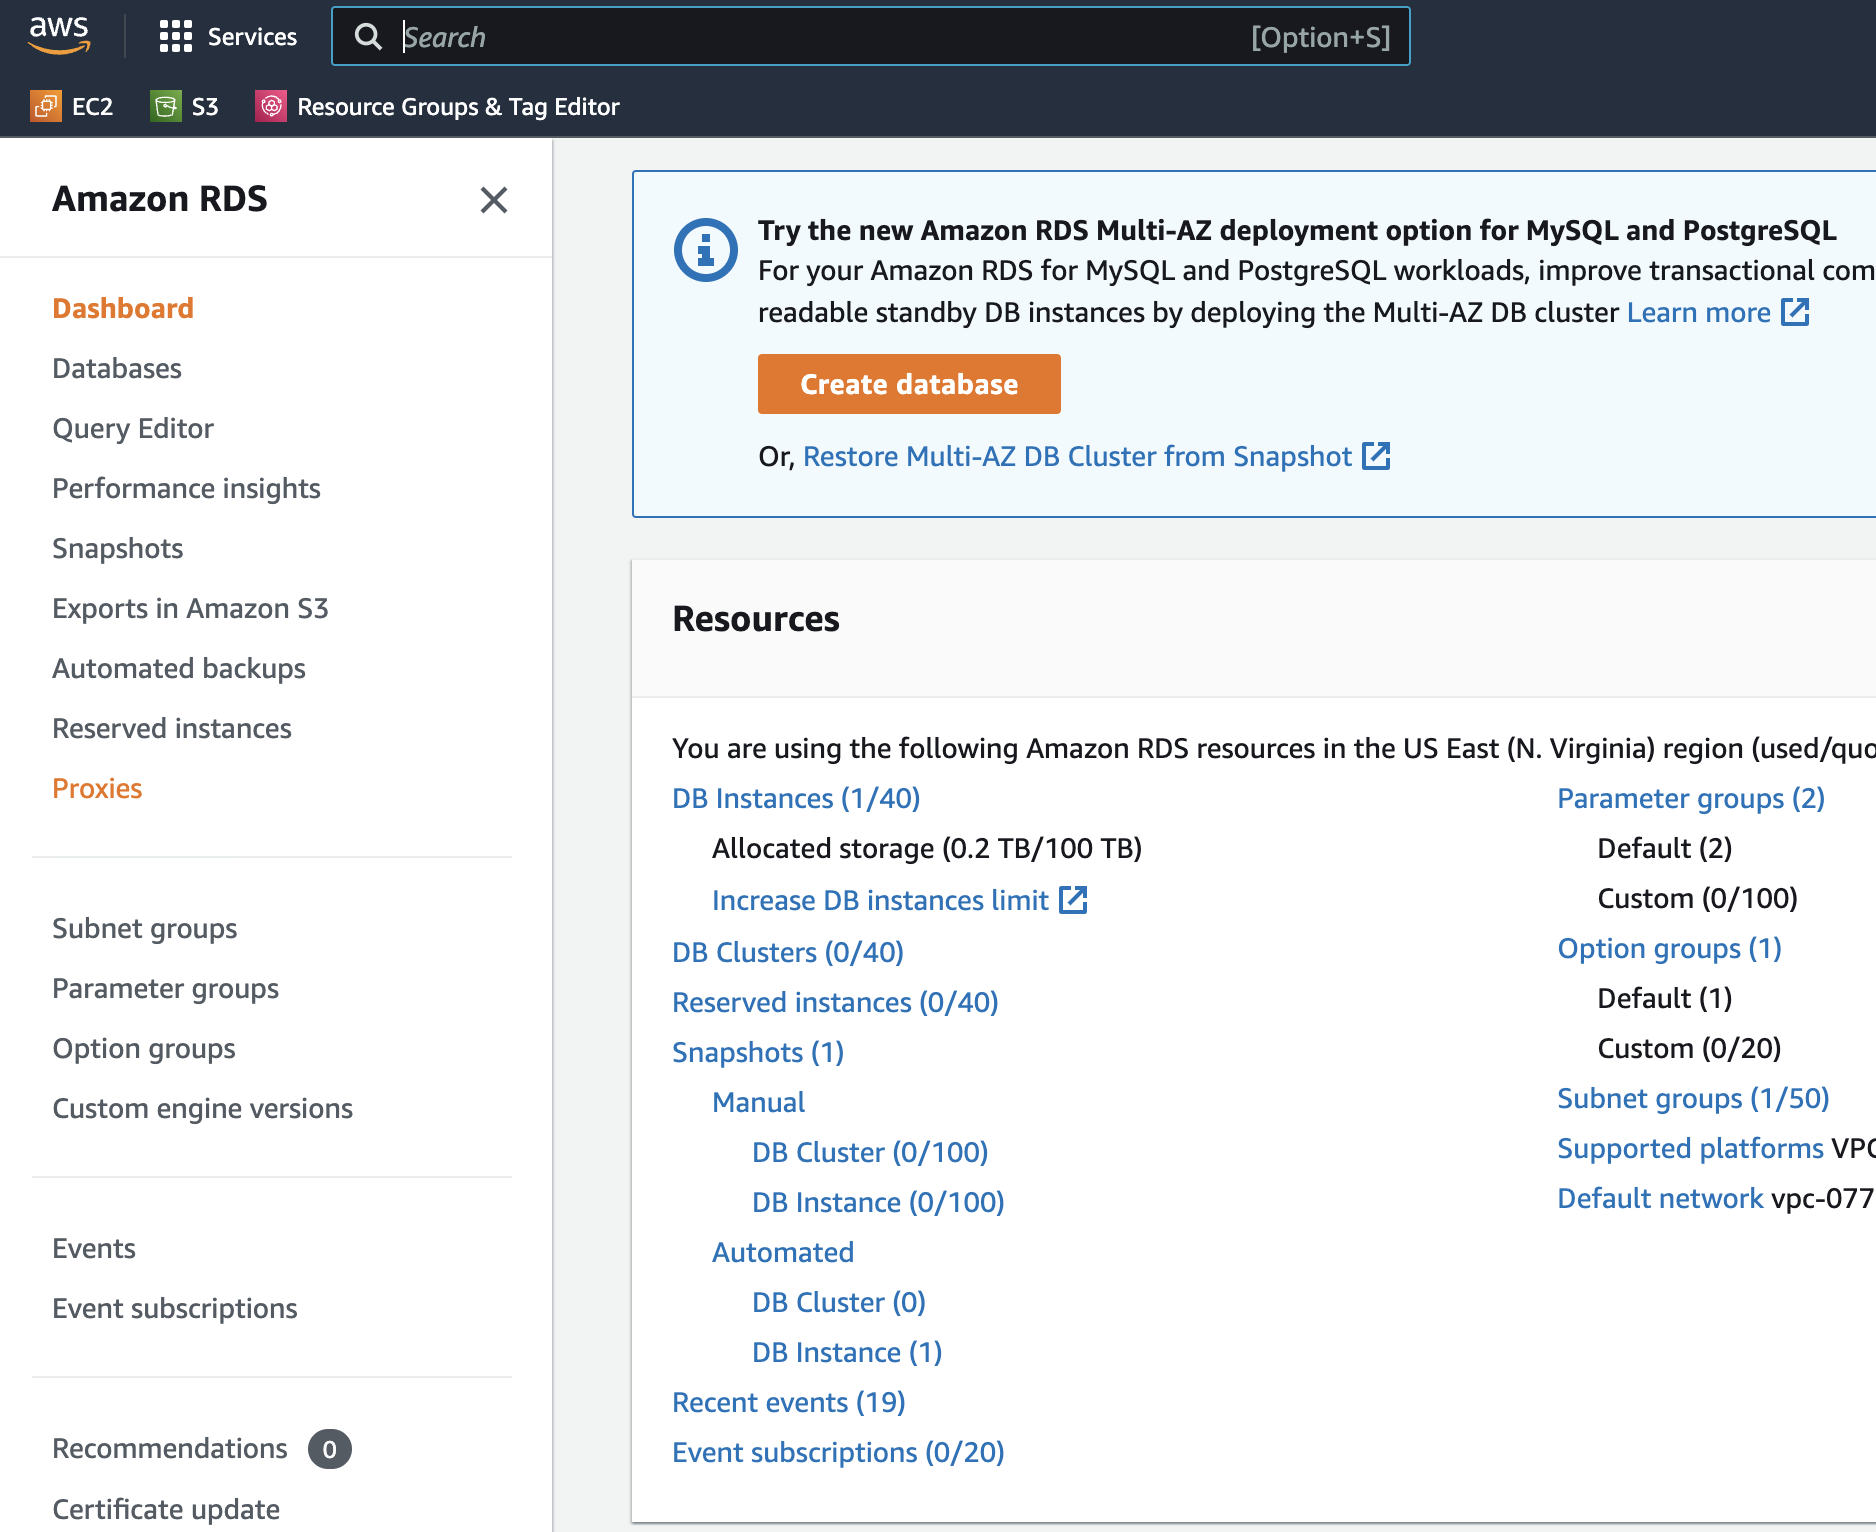
Navigate to the AWS console and search for RDS
For the database creation method, select the Standard create option.
Select MySQL for the Engine options.
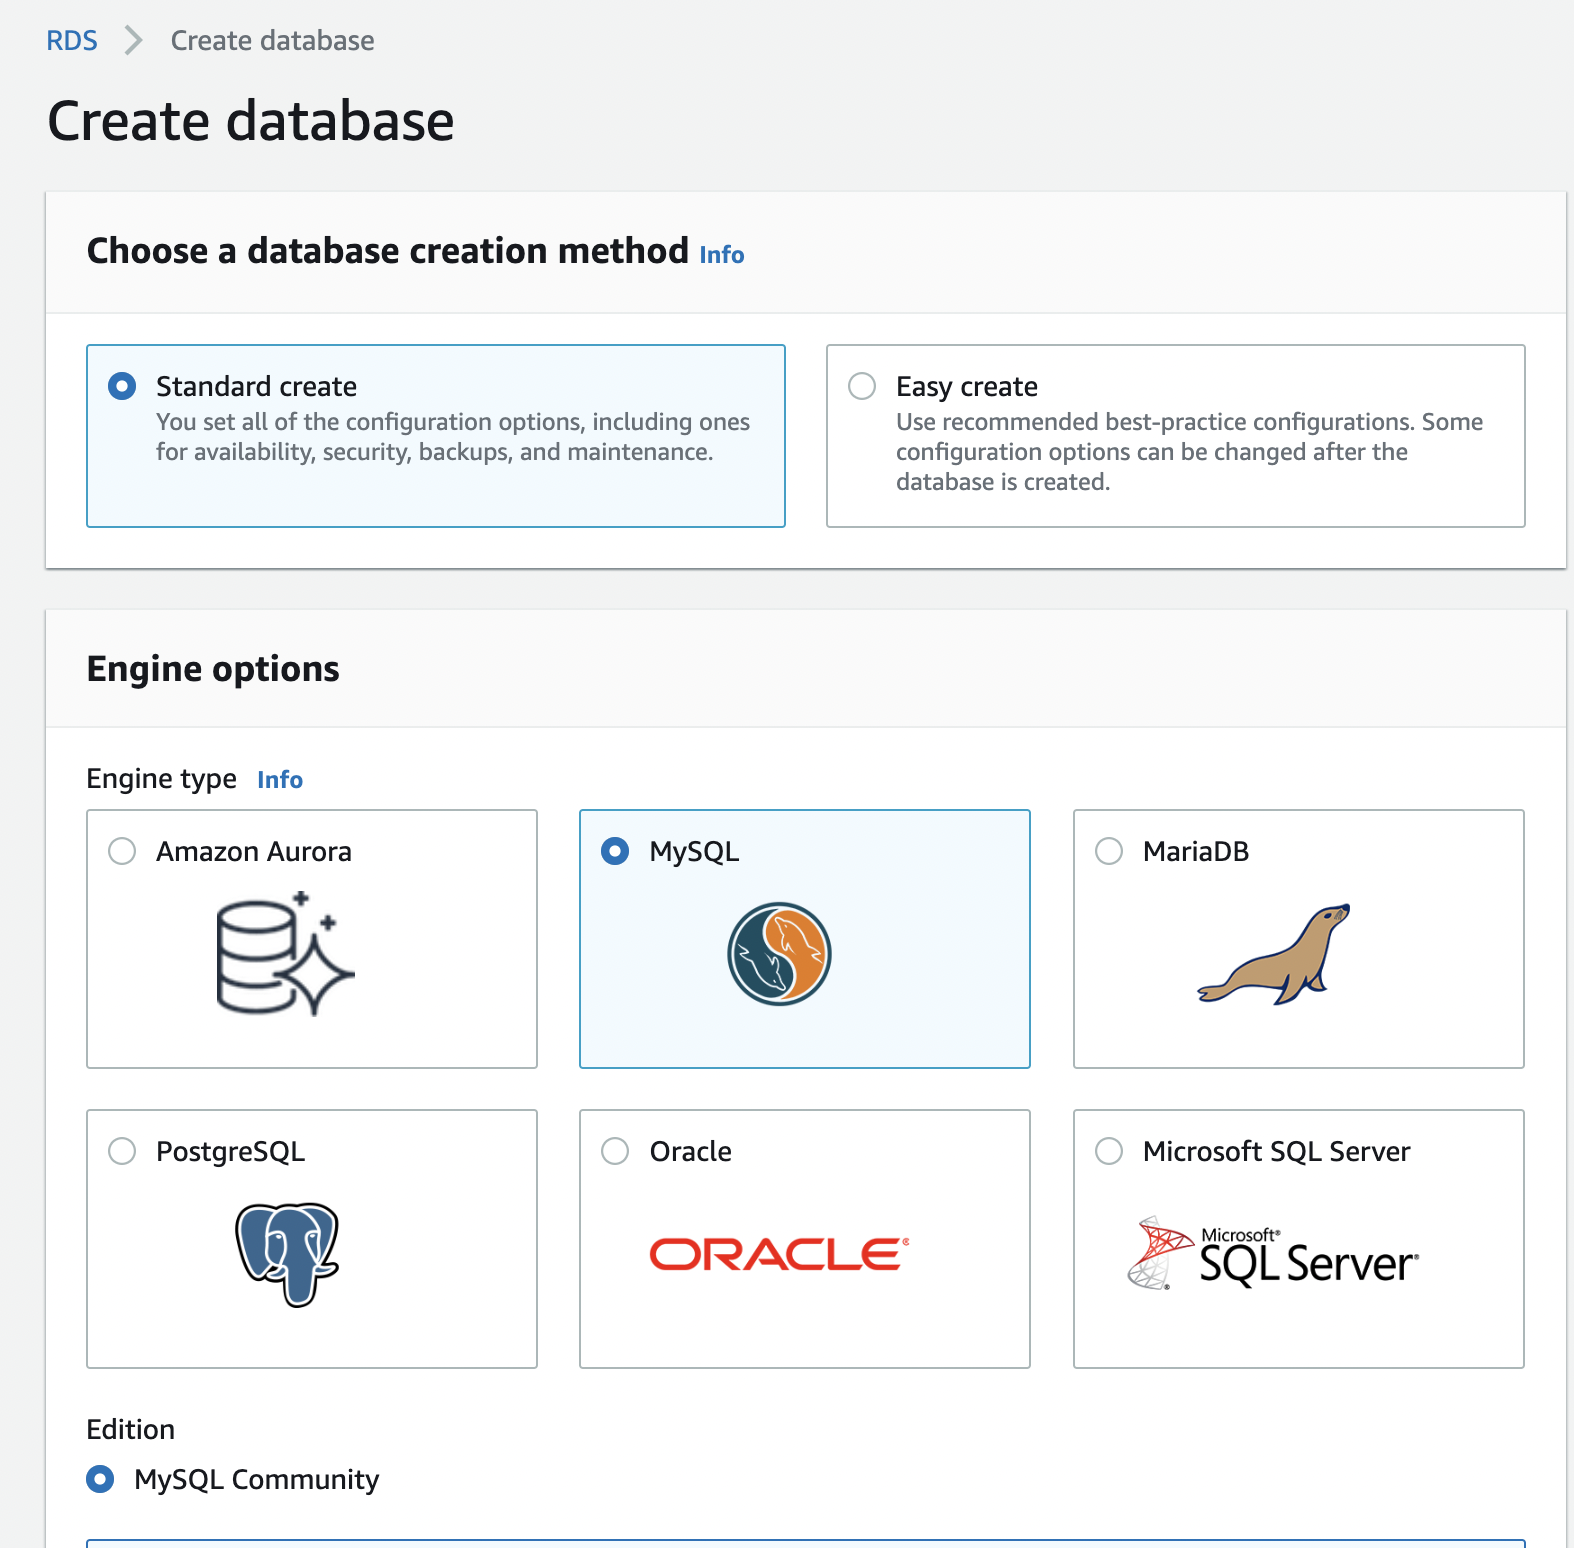
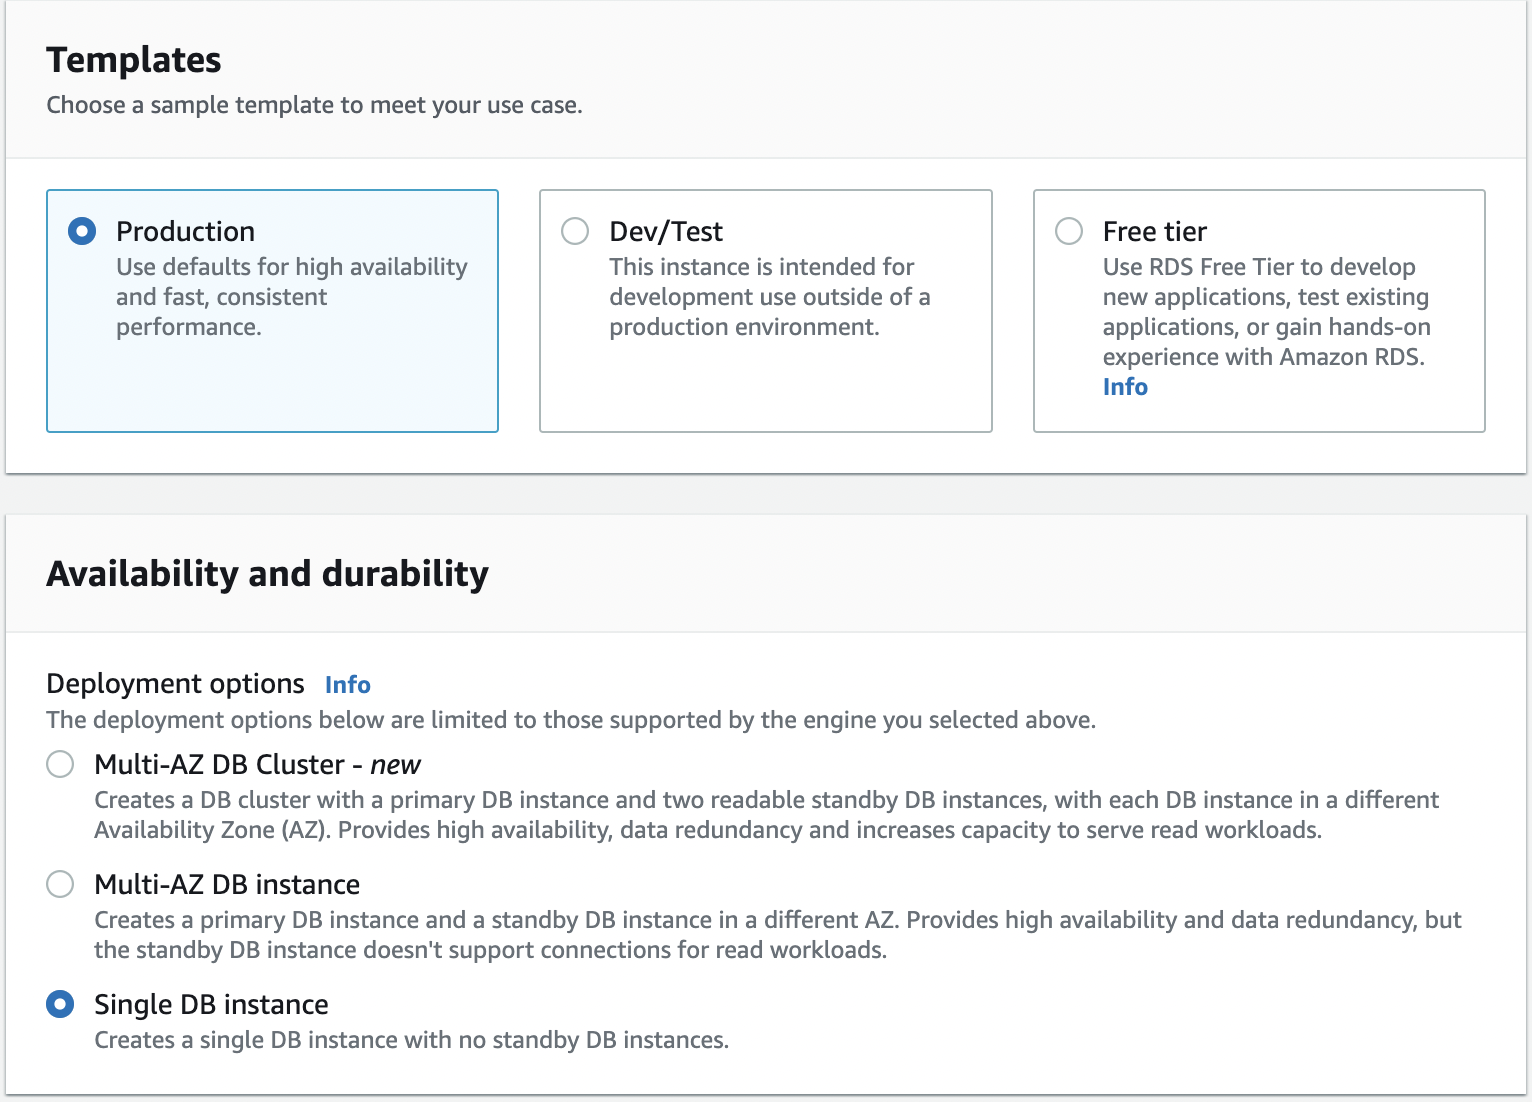
Select Production template
Select Single DB instance for Availability and durability (in production, you will want to use Multi-AZ)
On the Settings screen, enter the password and leave the rest of the settings as is.
For database instance configuration, select Burstable classes and choose at least a db.t3.medium instance size (we need more memory to enable Performance Insights)
For Storage type, select General Purpose SSD (gp2) and keep the rest of the settings default.
In terms of Connectivity, keep the default settings, maintaining No public access for the database instance; you can optionally create a new VPC if you like.
For Database authentication, select Password authentication
Under Monitoring, make sure Turn Performance Insights is checked
When done, click the Create Database button to launch your database instance.

Create Cloud9 environment
Create environment
Navigate to your AWS console and search for Cloud9.
Click on the Create environment button.
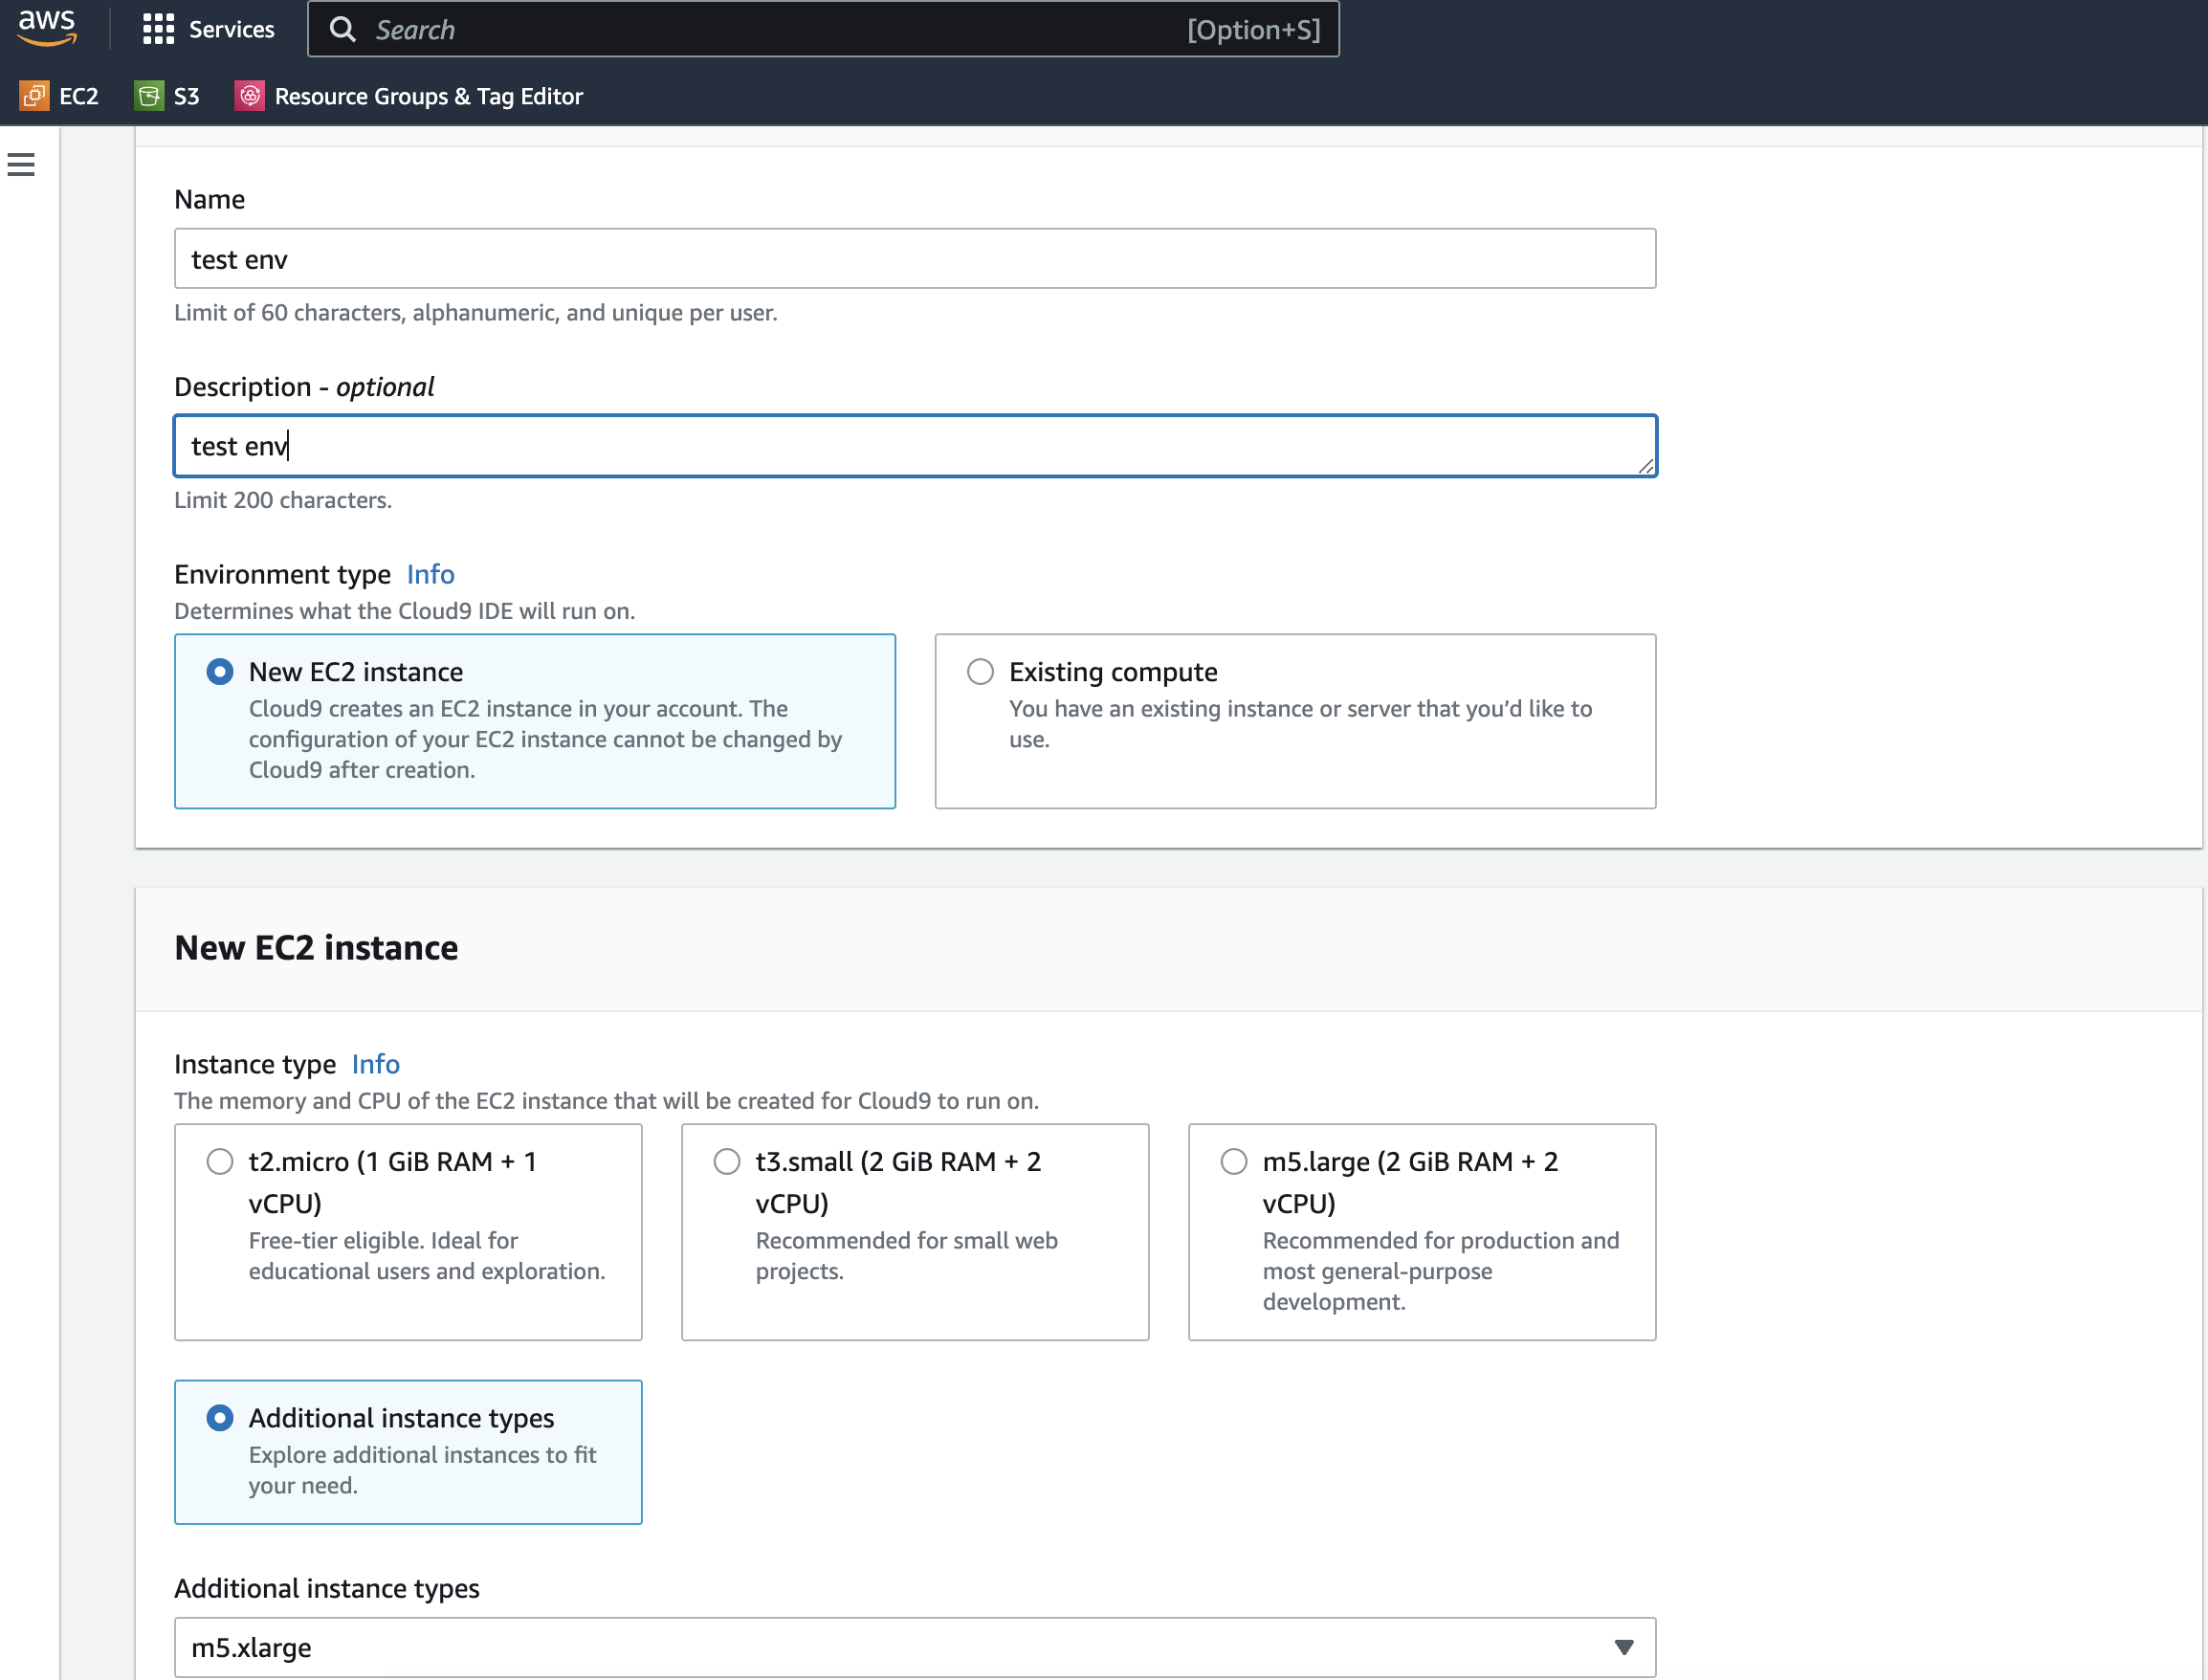
Provide a name for your environment.
Select Additional instance types then choose a m5.xlarge. We are selecting a larger instance because we want more resources for test load scripts. Otherwise, the kernel will kill our processes.
To avoid additional costs, always tear down your AWS resources when done.
5. Proceed with all the remaining steps and create your environment. The creation process may take a few minutes. 6. Give Cloud9 permission to access MySQL. Our Cloud9 environment will need permission to access our database instance. We achieve that by going to the instance’s security group and adding an inbound rule that allows MySQL traffic from our Cloud9 instance as below:

Import test database
AWS Cloud9 EC2 environments come preinstalled with Git. In your Cloud9 environment terminal, run the following commands:
git clone https://github.com/datacharmer/test_db.git && cd test_db
Run the script to create the database schema and load the data. Replace the host with your own database DNS endpoint.
mysql -h database-1.cxyzjeifrqhn.us-east-1.rds.amazonaws.com \
-u admin -p \
-t < employees.sql \
You should see output similar to the following:
+-----------------------------+
| INFO                        |
+-----------------------------+
| CREATING DATABASE STRUCTURE |
+-----------------------------+
+------------------------+
| INFO                   |
+------------------------+
| storage engine: InnoDB |
+------------------------+
+---------------------+
| INFO                |
+---------------------+
| LOADING departments |
+---------------------+
...
Test database instance without RDS Proxy
How many connections is too many?
Before we start testing, let's figure out how many connections are too many for our database instance. For example, the maximum number of simultaneous database connections varies by the DB engine type and the memory allocation for the DB instance class. The larger the database instance, the larger the connections it can handle. So there is a formula that you can use to calculate the maximum number of connections. For MySQL, we use:
max_connections = {DBInstanceClassMemory/12582880}
In our case, we are using a db.t3.medium instance with a memory of 4 GiB.
max_connections = 1024*1024*1024*4/12582880 ~= 341
Less than max_connections test
mysqlslap -h database-1.cxyzjeifrqhn.us-east-1.rds.amazonaws.com -u admin -p \
--concurrency=100 \
--create-schema=employees \
--query="SELECT * FROM employees;" \
--verbose
Enter password:
Benchmark
        Average number of seconds to run all queries: 18.414 seconds
        Minimum number of seconds to run all queries: 18.414 seconds
        Maximum number of seconds to run all queries: 18.414 seconds
        Number of clients running queries: 100
        Average number of queries per client: 1
More than max_connections test
Remember 341 is our max_connections. Let's try with 345.
$ mysqlslap -h database-1.cxyzjeifrqhn.us-east-1.rds.amazonaws.com -u admin -p \
> --concurrency=345 \
> --create-schema=employees \
> --query="SELECT * FROM employees;" \
> --verbose
Enter password:
mysqlslap: Error when connecting to server: 1040 Too many connections
mysqlslap: Error when connecting to server: 1040 Too many connections
mysqlslap: Error when connecting to server: 1040 Too many connections
mysqlslap: Error when connecting to server: 1040 Too many connections
...
...
mysqlslap: Error when connecting to server: 1040 Too many connections
mysqlslap: Error when connecting to server: 1040 Too many connections
Benchmark
        Average number of seconds to run all queries: 54.603 seconds
        Minimum number of seconds to run all queries: 54.603 seconds
        Maximum number of seconds to run all queries: 54.603 seconds
        Number of clients running queries: 345
        Average number of queries per client: 1
Create RDS Proxy
Click proxies on the left menu of RDS
Our next step is creating the RDS Proxy to pool our connections.
- Click on the Proxies link on the left menu in the Amazon RDS console.
- Click Create proxy button and enter name it database-1-proxy or anything.
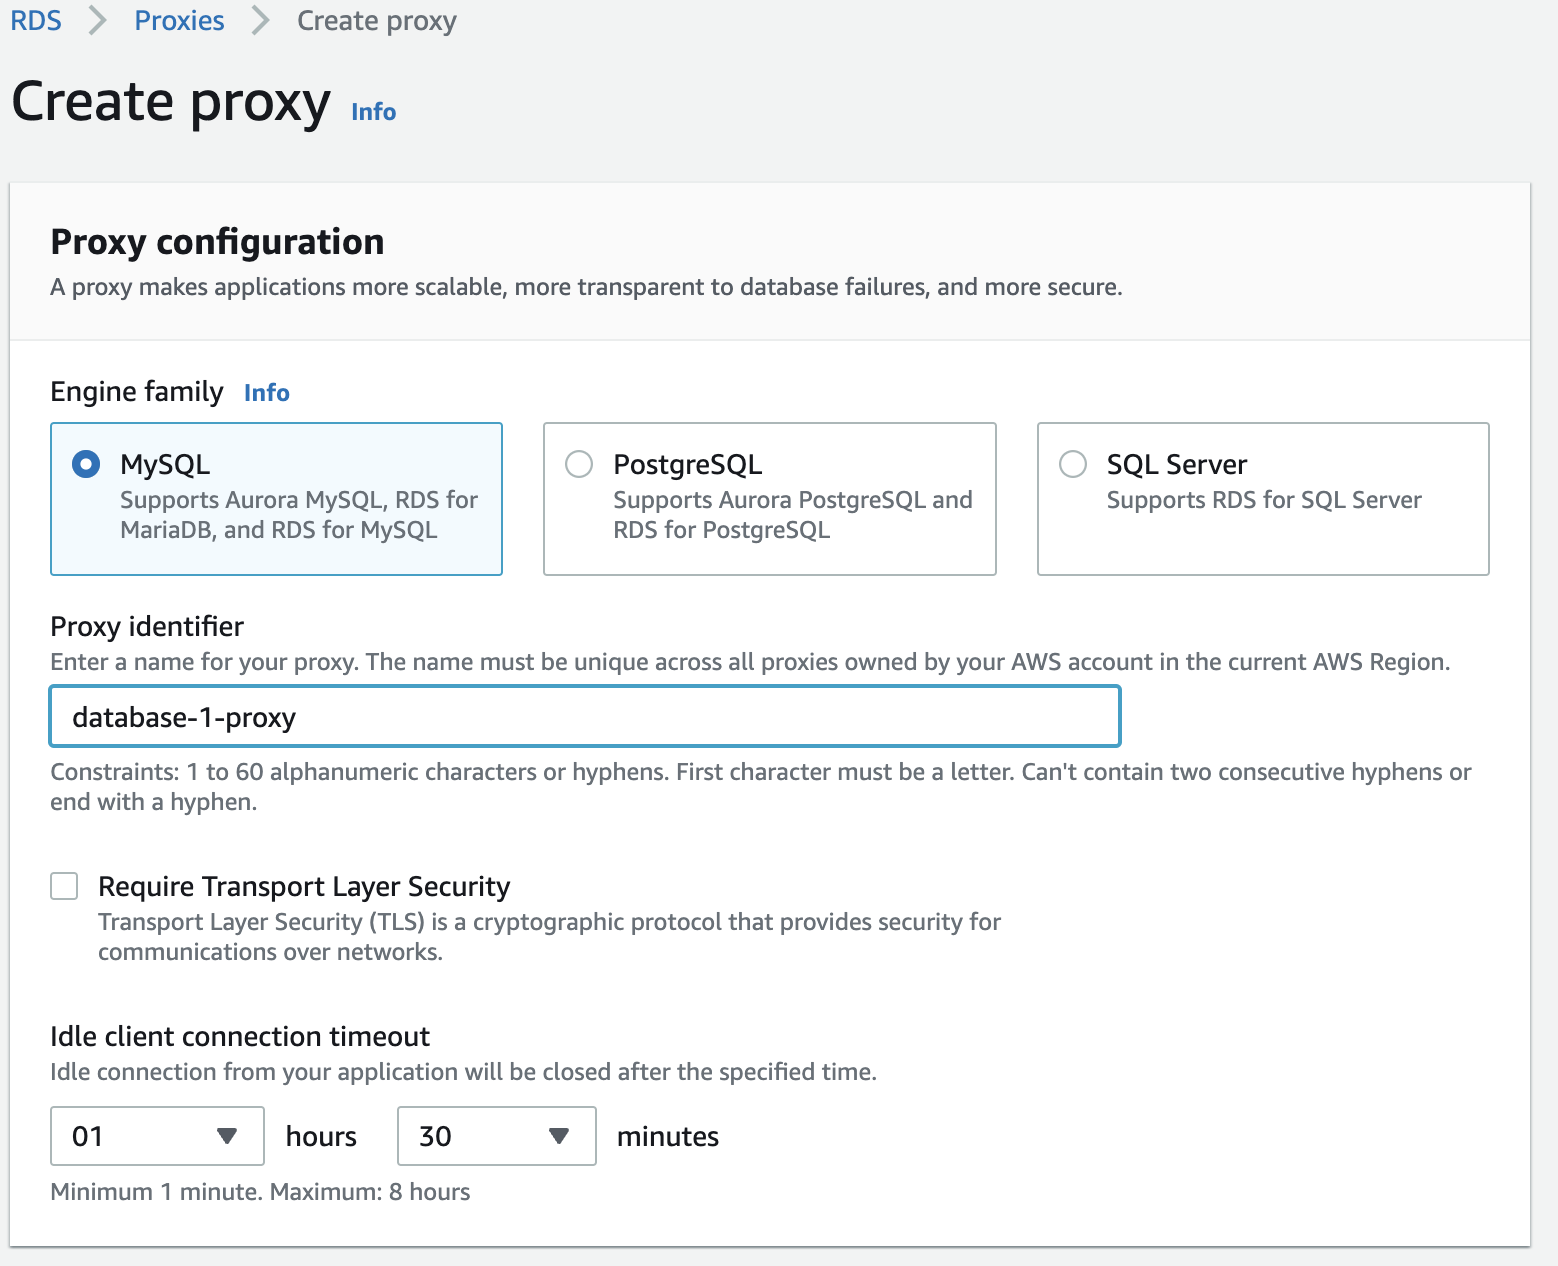
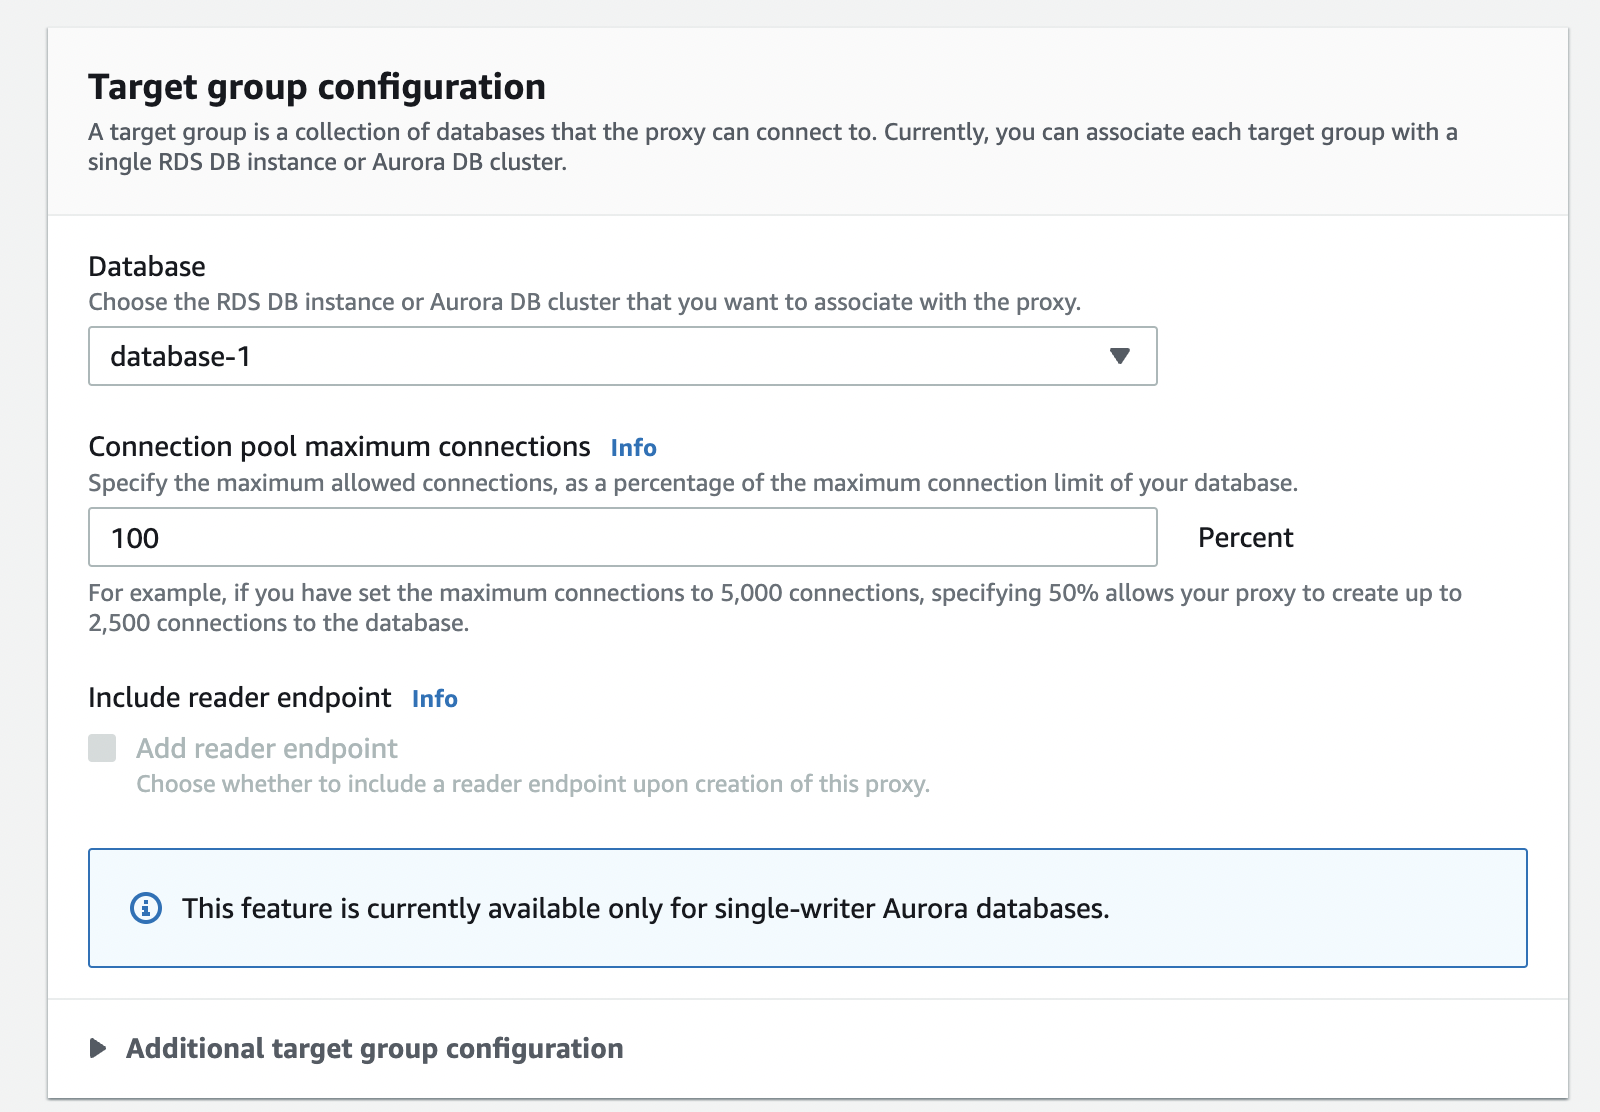
- Next, we need a target database instance for the proxy by selecting it from the database dropdown.
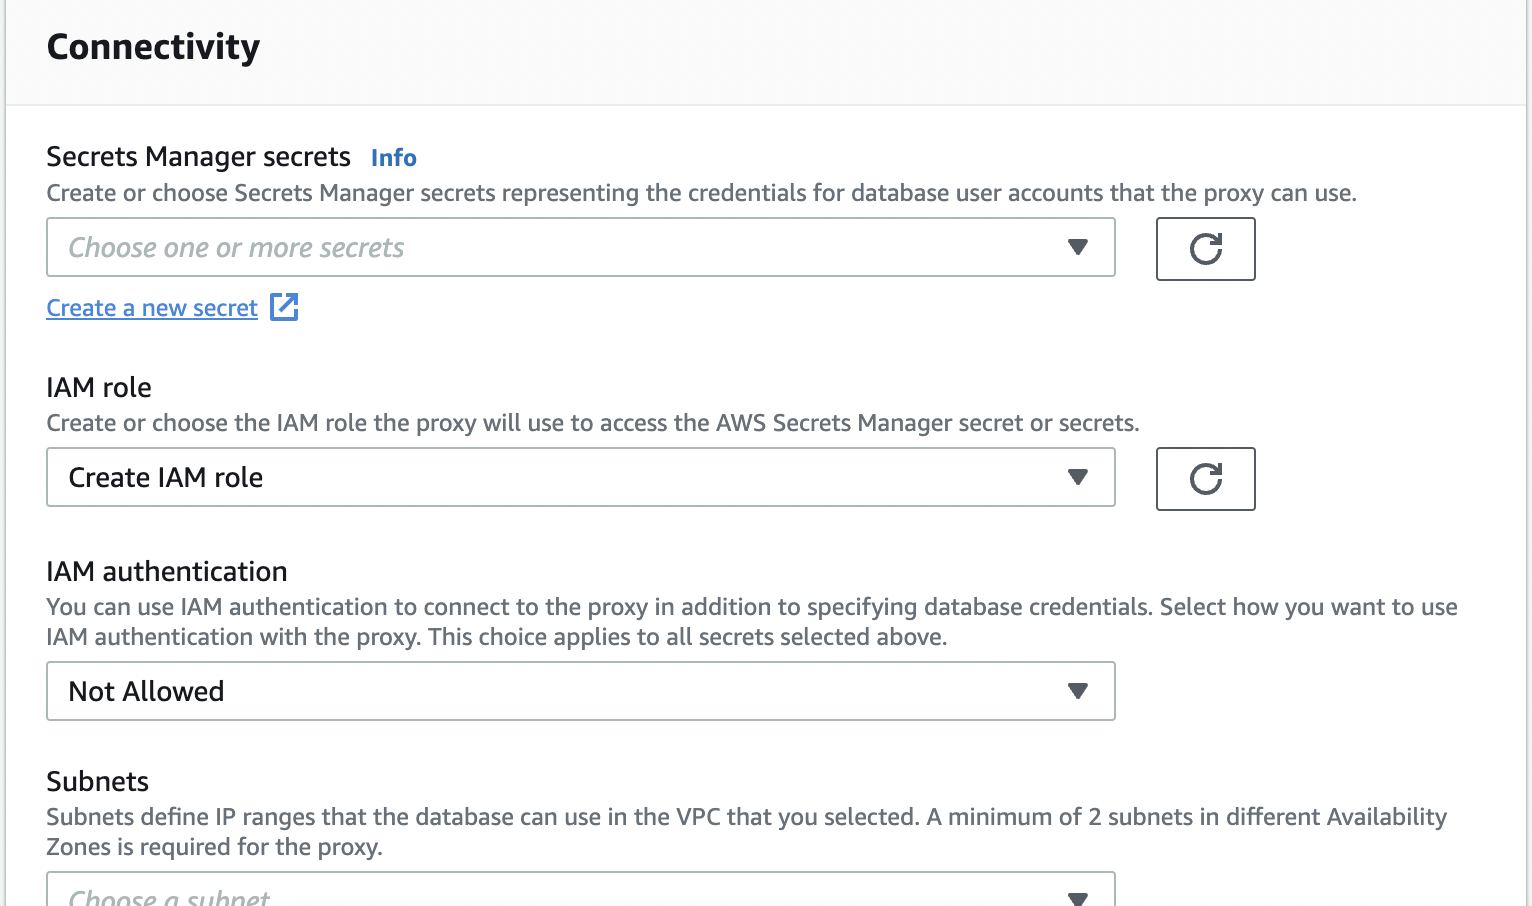
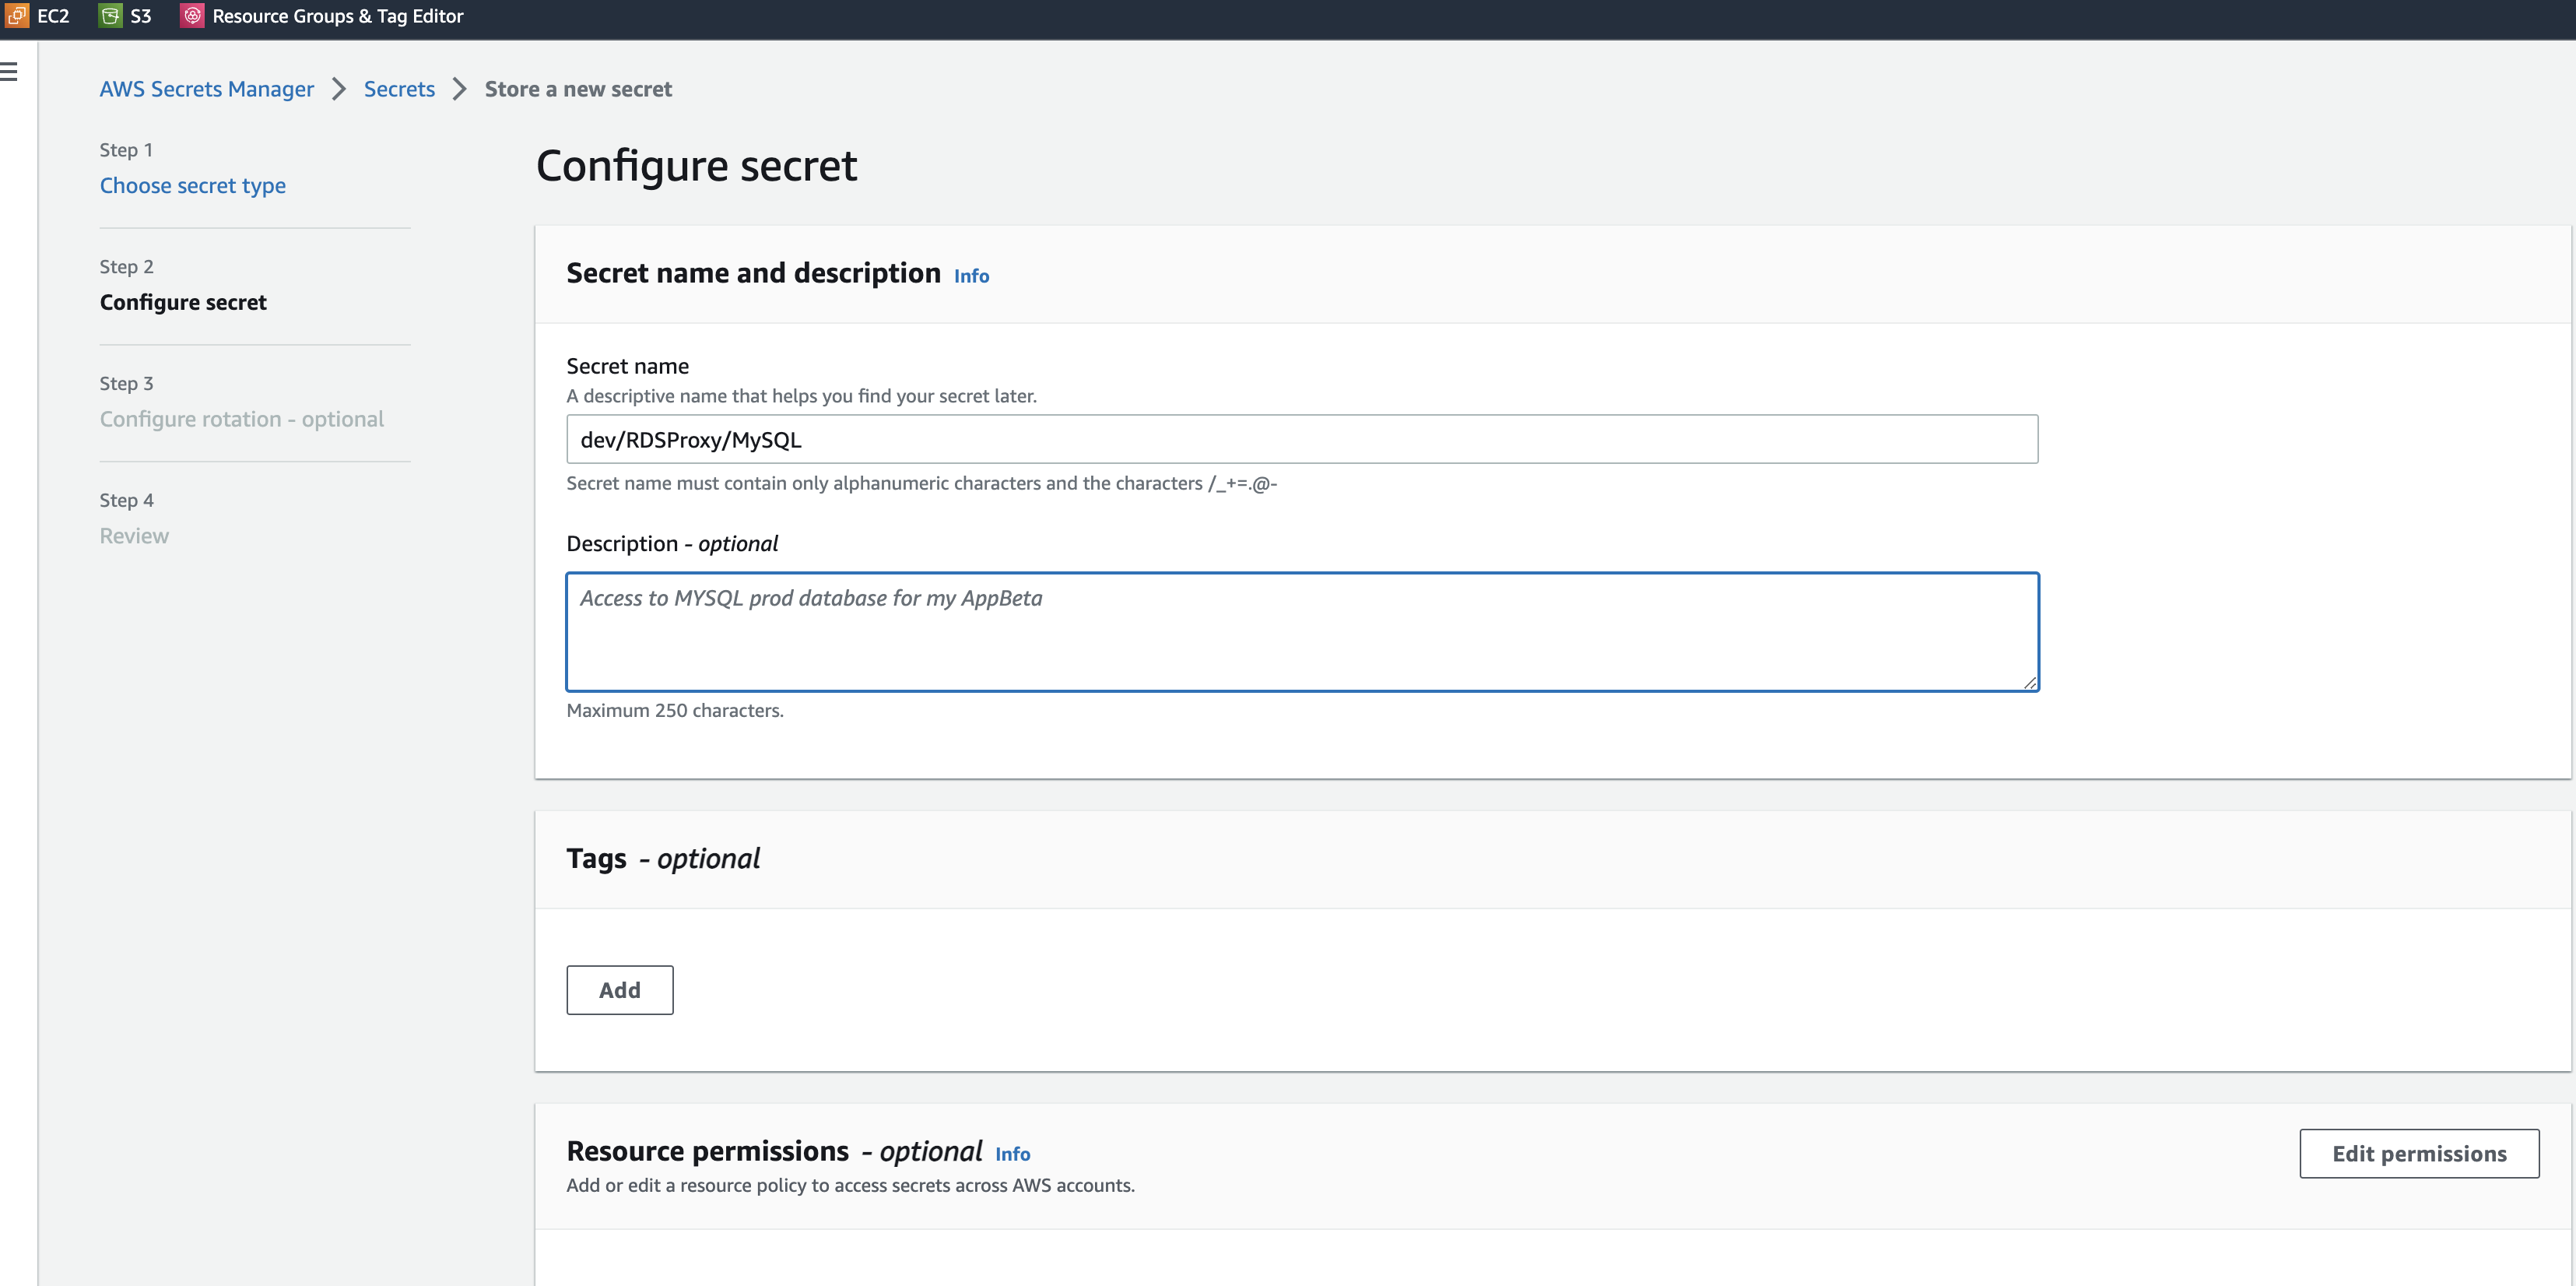
- Supply a secret from AWS Secrets Manager; RDS proxy stores credentials in AWS Secrets Manager, and we will create a new secret.
- AWS Secrets Manager will open in a new tab. Choose Credentials for Amazon RDS database and enter a username and password. You will need these credentials to connect to your RDS proxy.
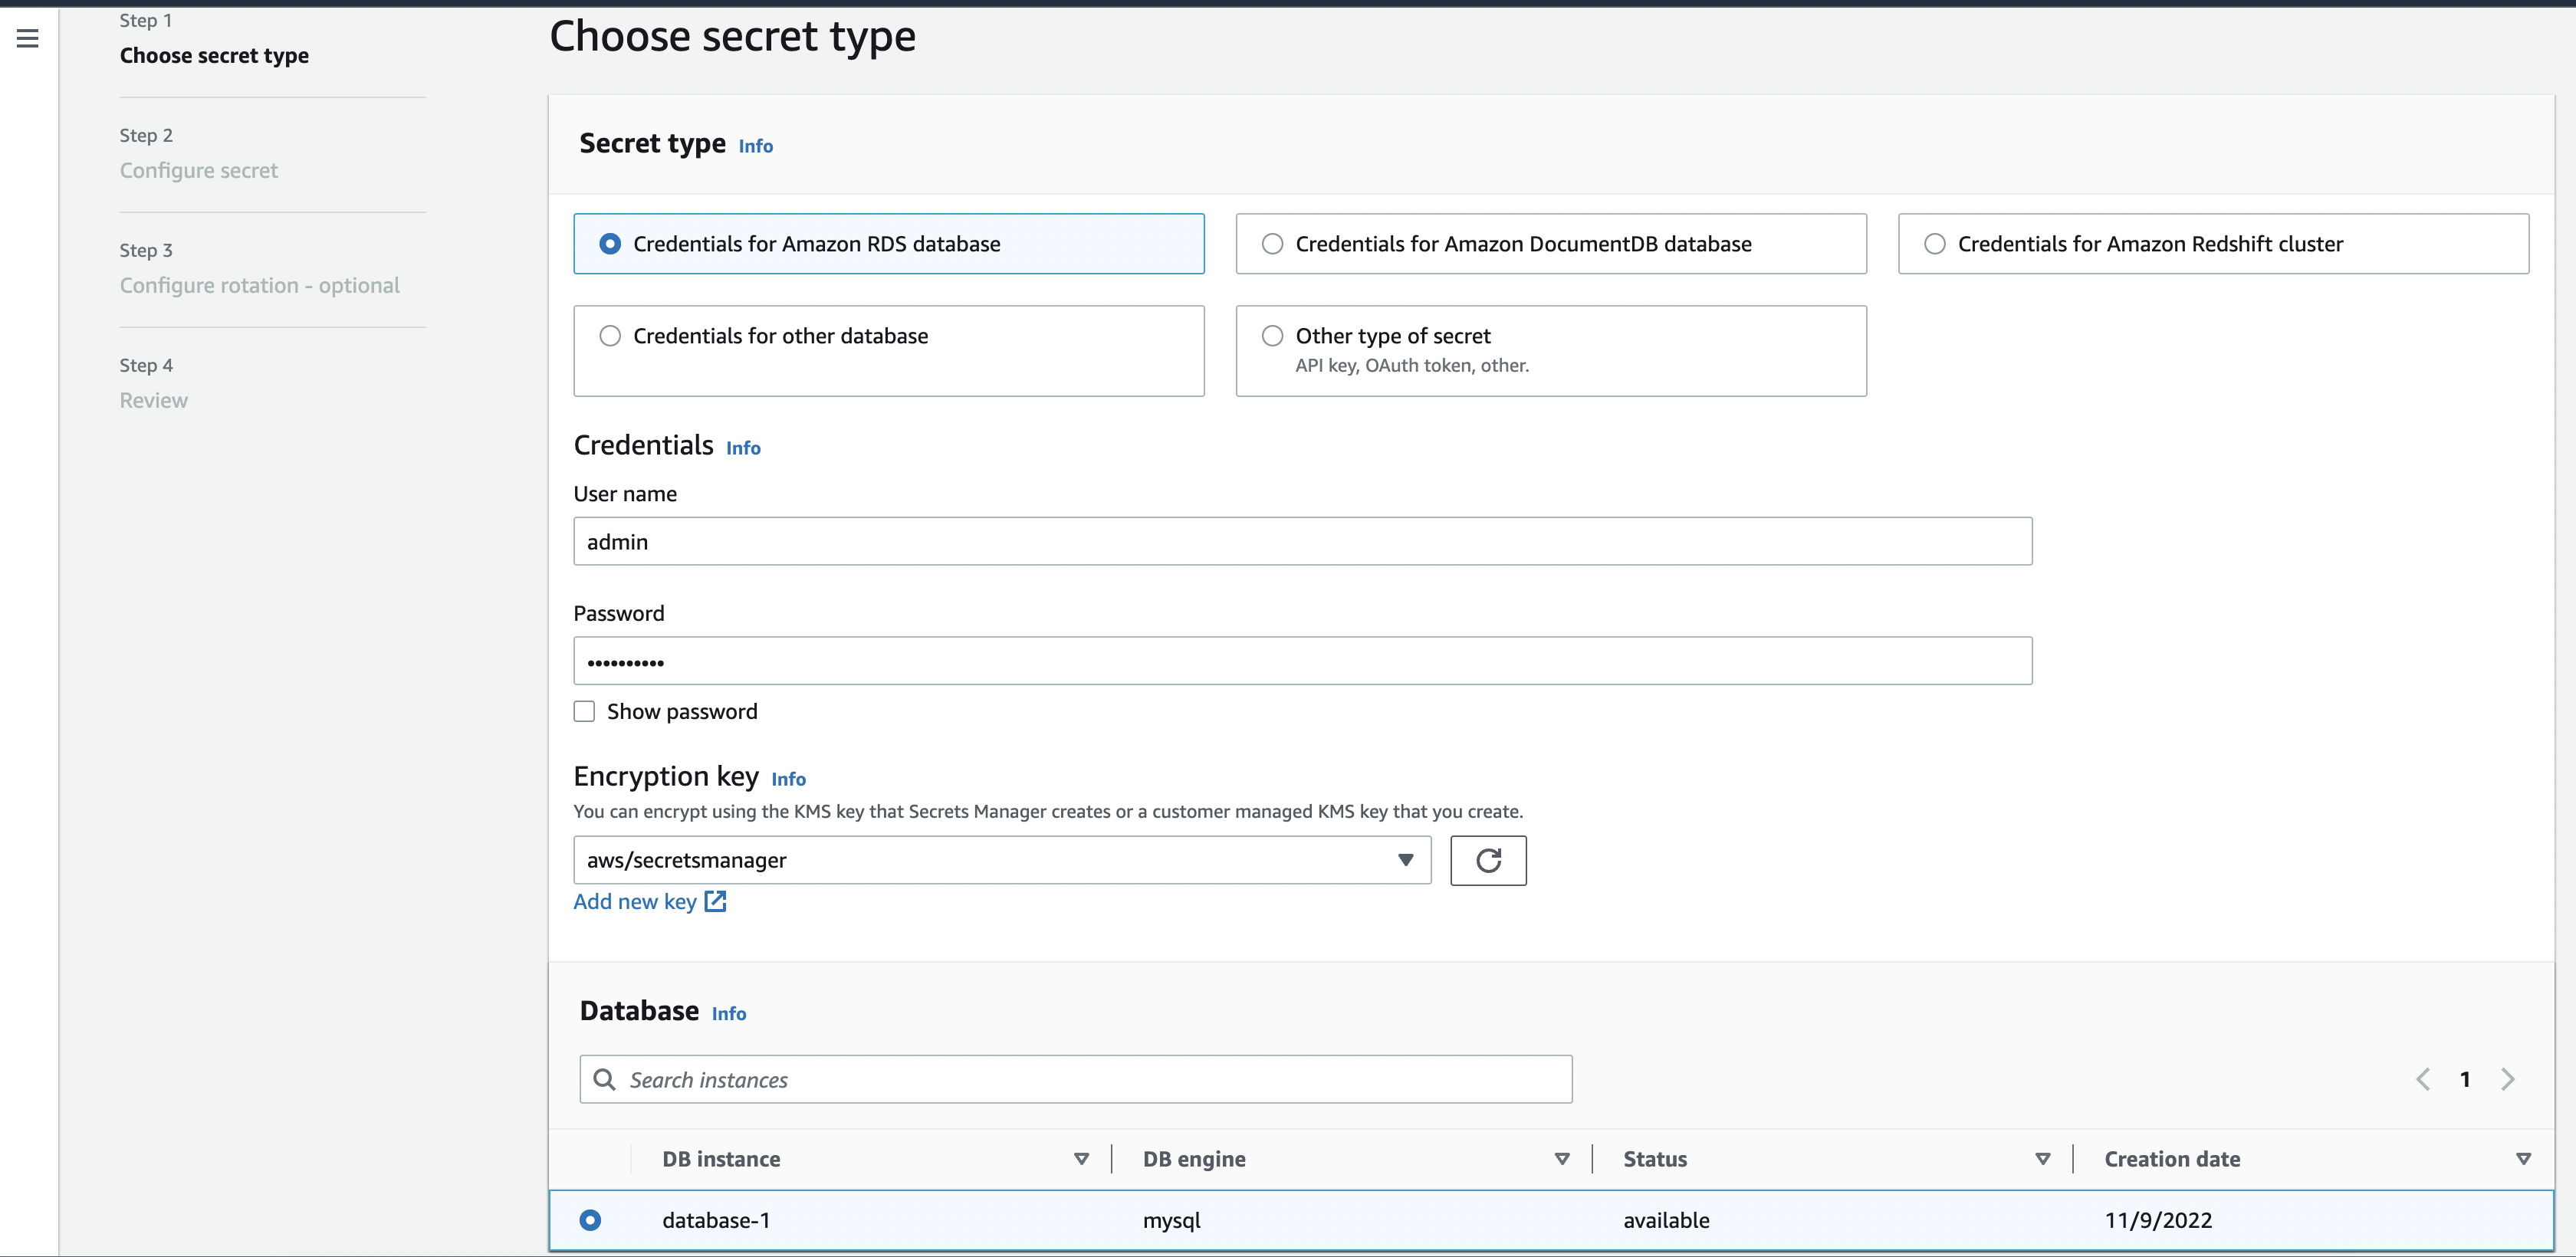
Select your database at the bottom and click next.
- Enter a name for your secret.
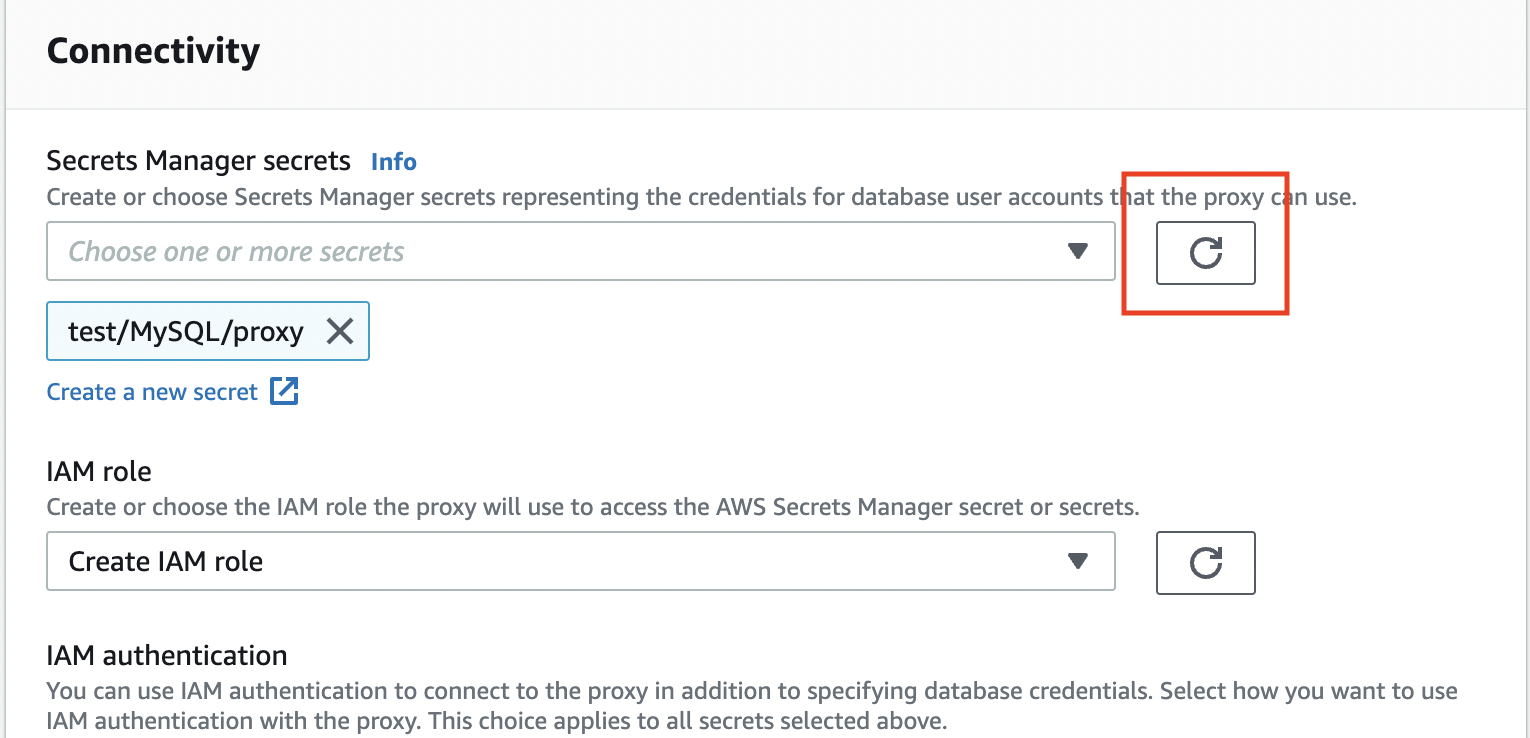
- Now go back to the tab with the RDS Proxy creation form, refresh the secret selection and choose your created secret.
Scroll down and click Create proxy. Creation may take up to 20 mins
You need to wait until you have both endpoint and target group identifier statuses set to available, as seen below.
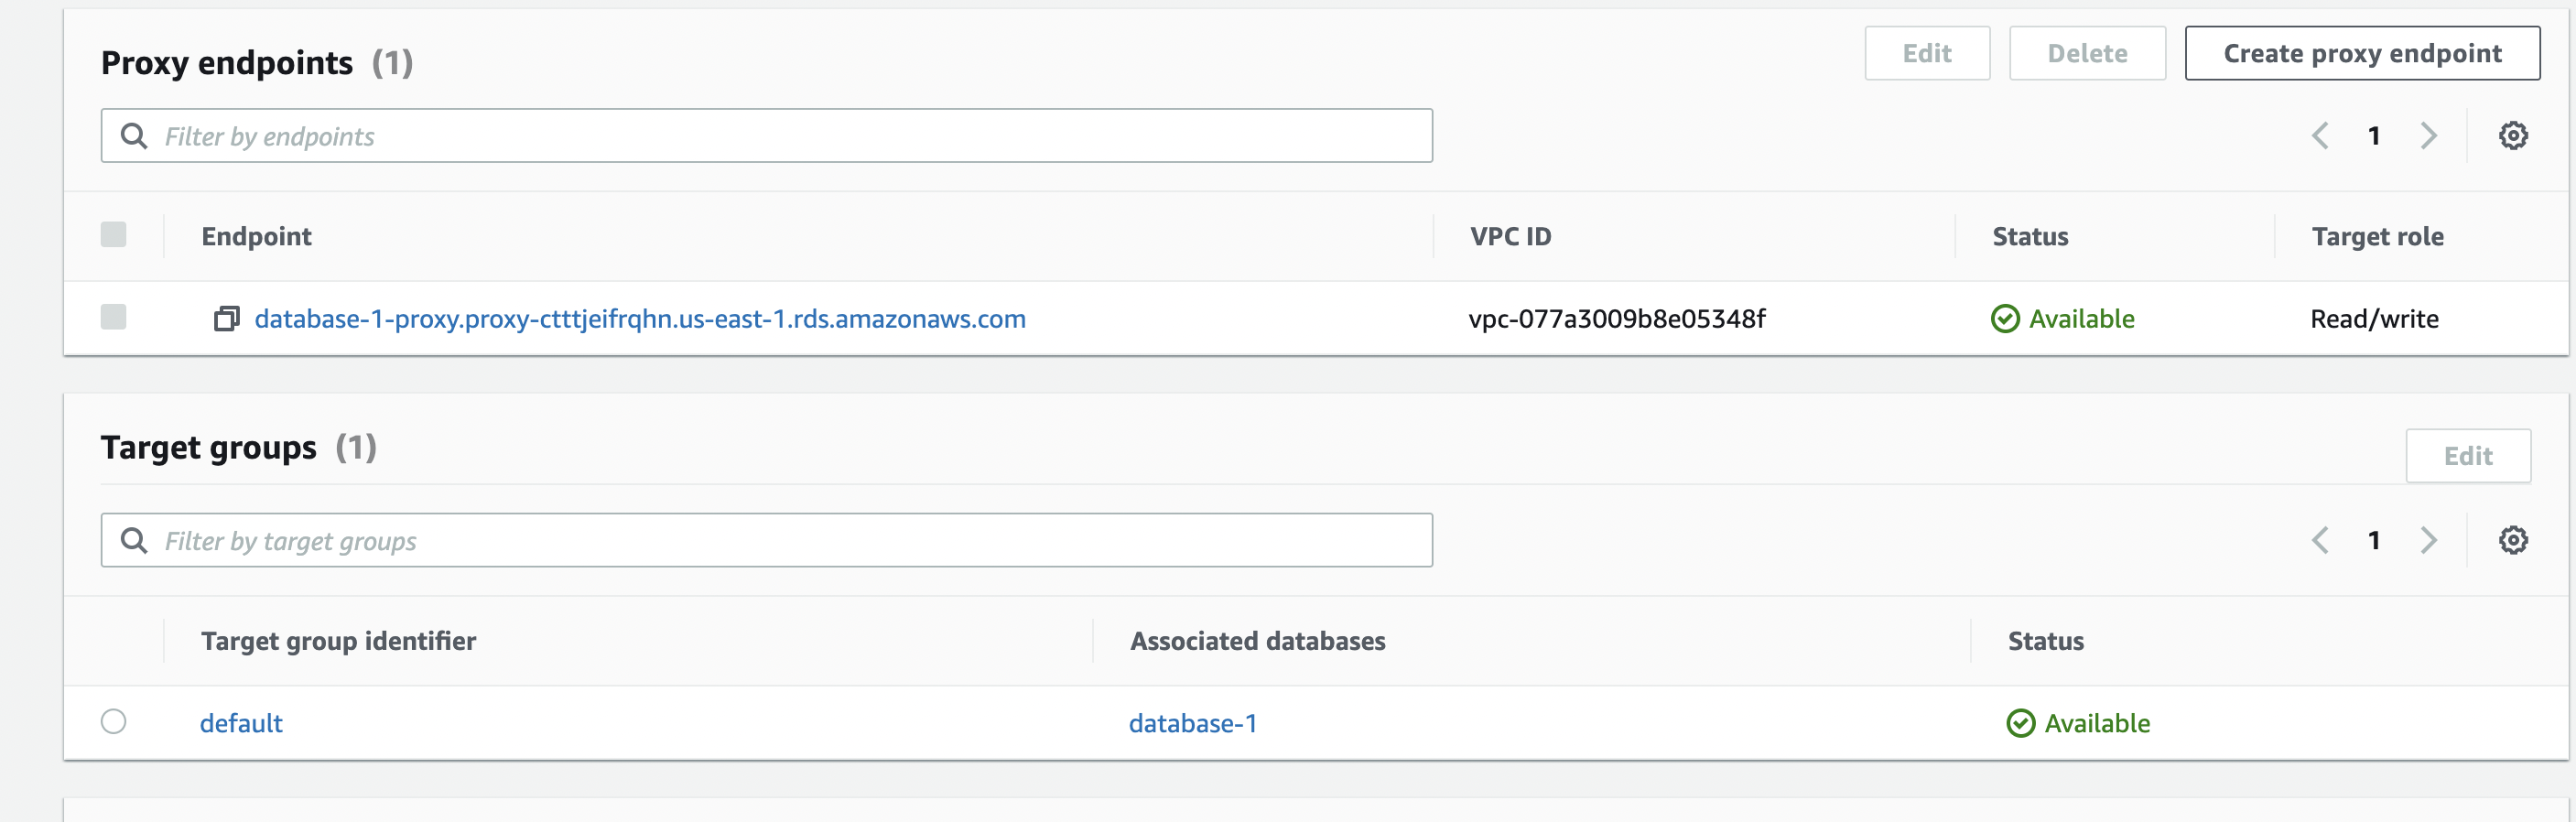
- Copy your proxy endpoint, and we will use that next.
Test database instance with RDS Proxy
More than max_connections test - RDS Proxy
Let's test with the same number of connections that errored out when we didn't use RDS proxy.
mysqlslap -h database-1-proxy.proxy-ctttjeifrqhn.us-east-1.rds.amazonaws.com \
> -u admin -p \
> --concurrency=345 \
> --create-schema=employees \
> --query="SELECT * FROM employees;" \
> --verbose
Enter password:
Benchmark
        Average number of seconds to run all queries: 65.294 seconds
        Minimum number of seconds to run all queries: 65.294 seconds
        Maximum number of seconds to run all queries: 65.294 seconds
        Number of clients running queries: 345
        Average number of queries per client: 1
Results
You will notice that we didn't get Error when connecting to server: 1040 Too many connections, and we completed our queries (despite being slow).
Counter Metrics
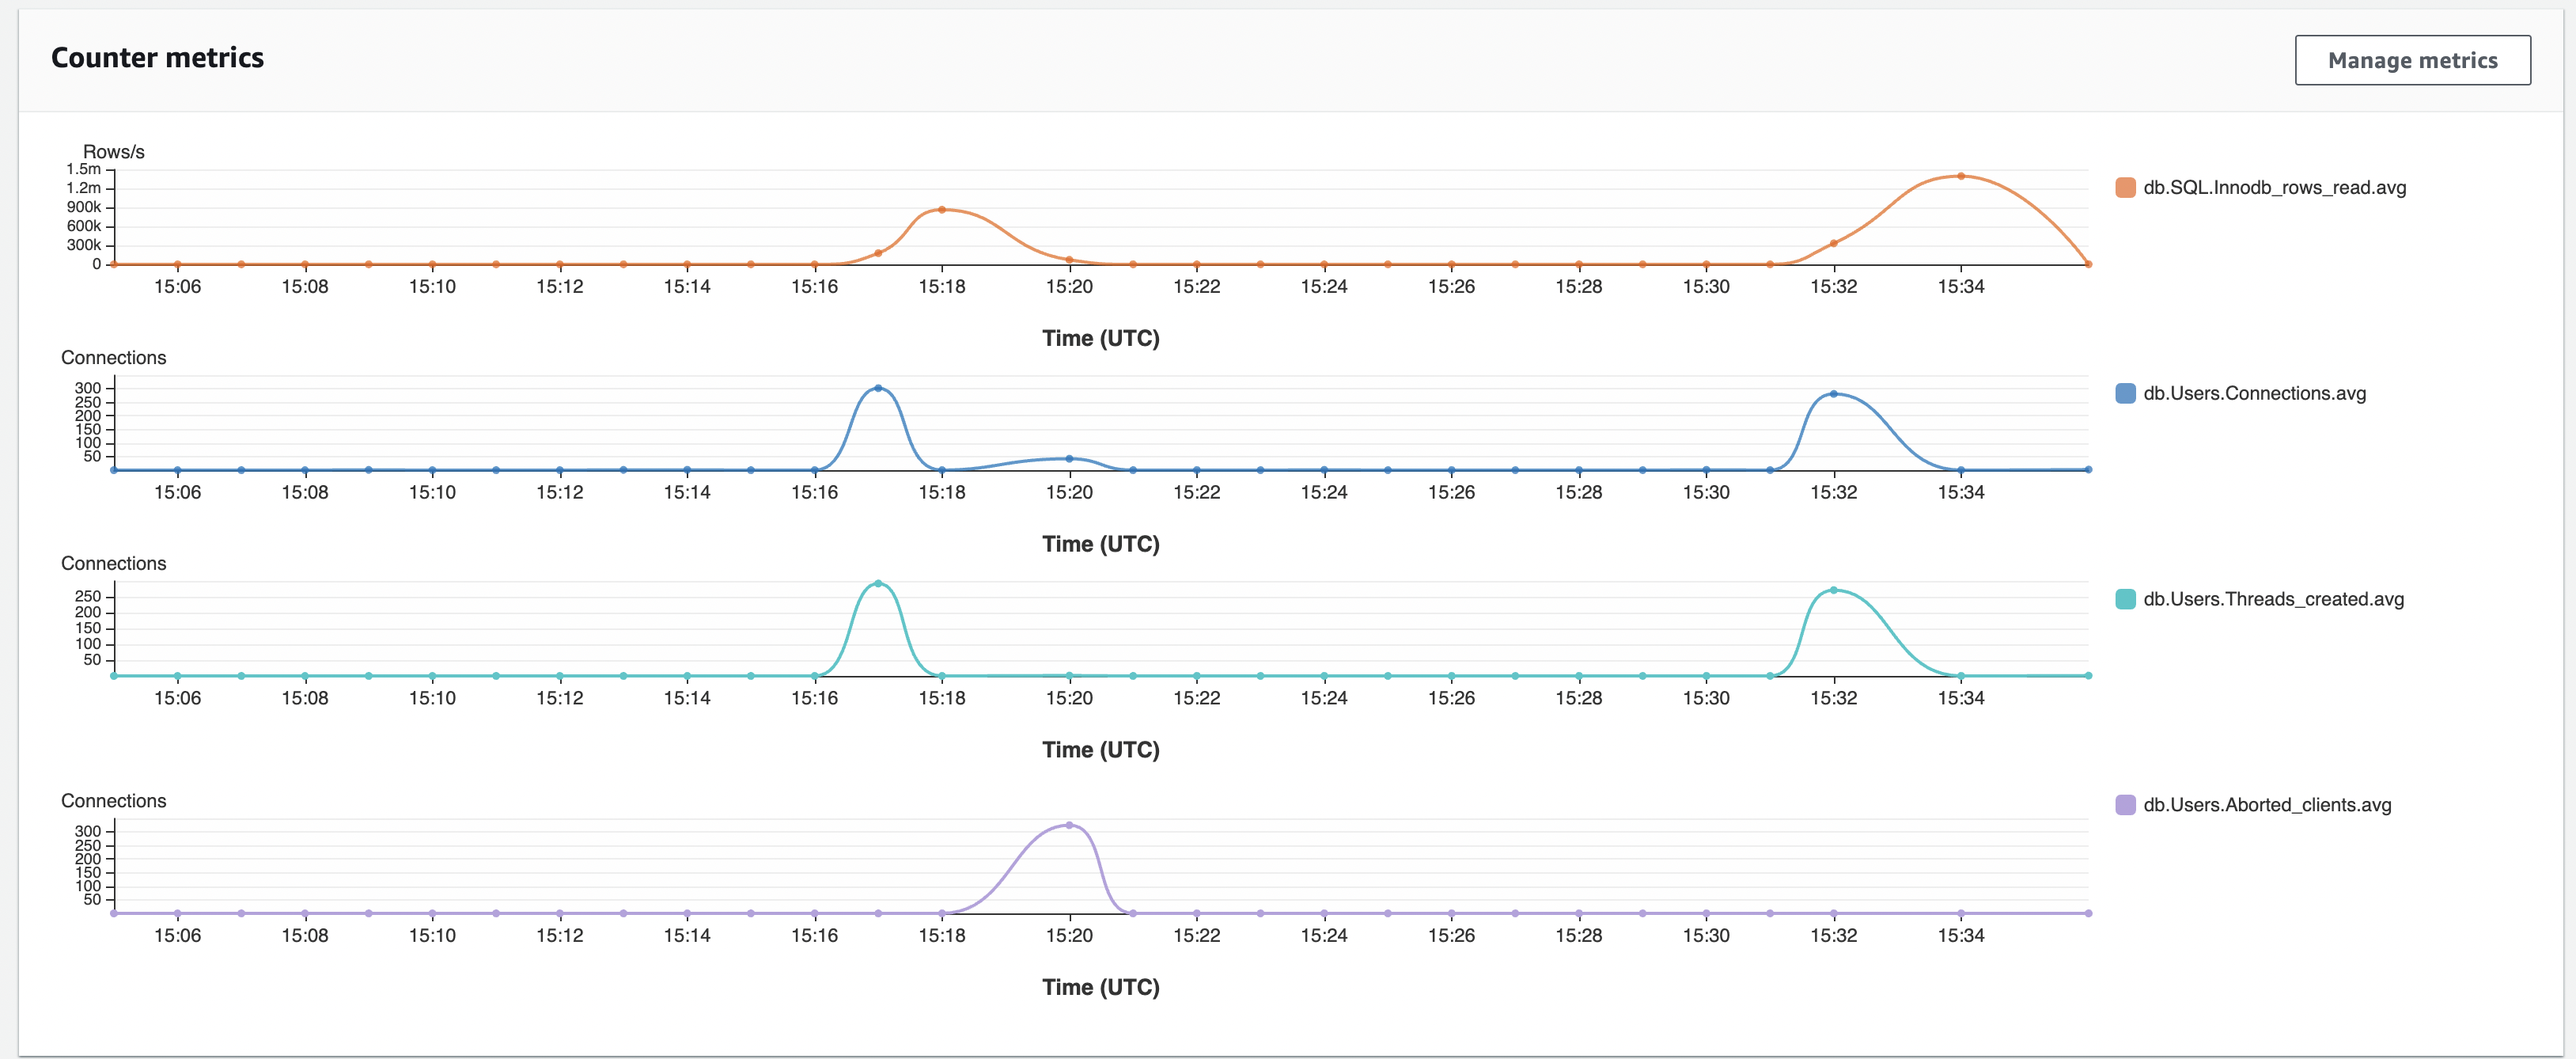
In the chart above, you will notice that without an RDS proxy, we have several db.Users.Aborted_clients. However, when we ran the queries using the proxy, we didn't experience any aborted connections. As a result, we could read more rows, as shown by the db.SQL.Innodb_rows_read metric.
Waits comparison
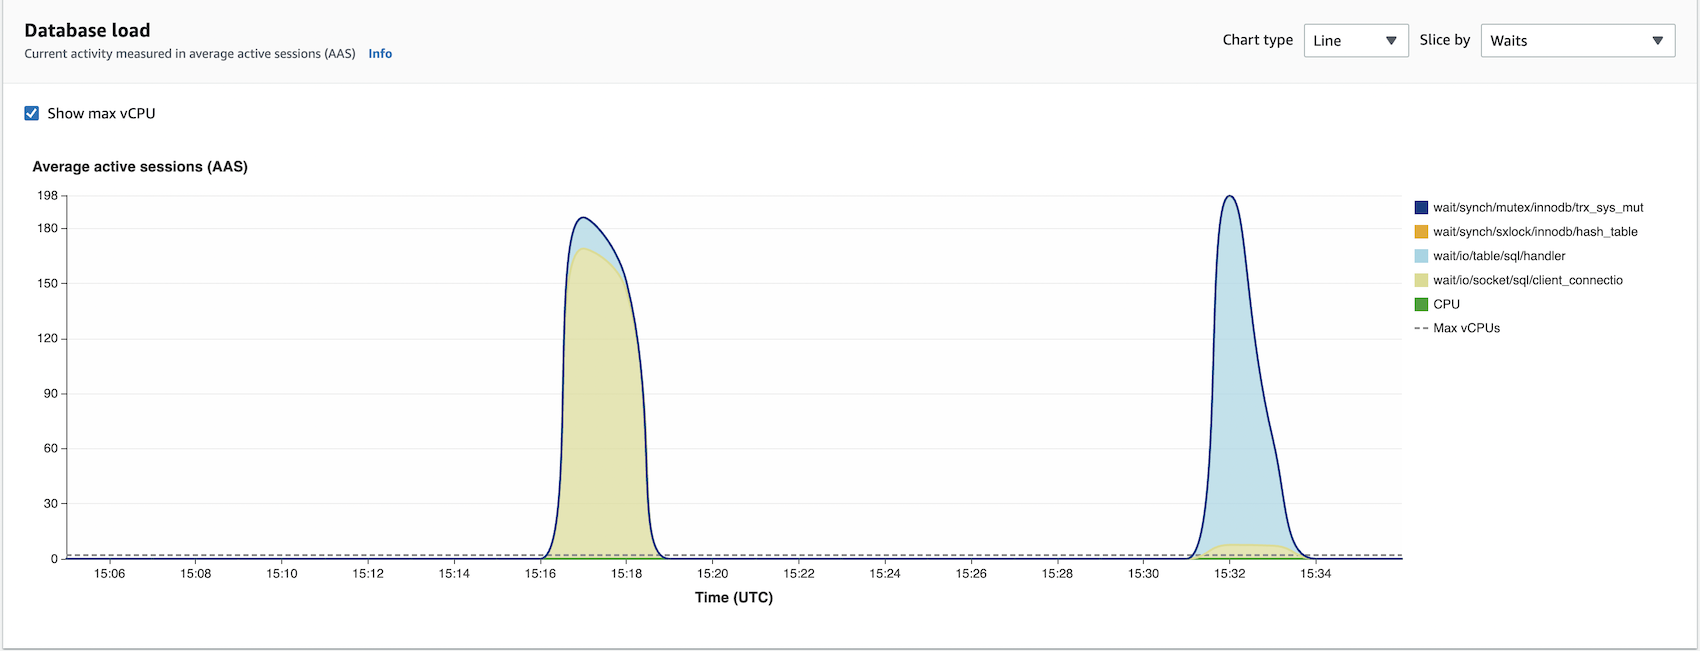
Waits dimension is an integral part of performance troubleshooting. Waits are reasons why execution threads have to wait. So when you issue queries, various wait stats could prevent your query execution from completing. These can range from CPU or connection waits. In other words, your execution threads will be waiting for resources.
Now, if we look at our chart above, wait/io/socket/sql/client_connection dimension is higher for operations not using an RDS proxy. io/socket/sql/client_connection event occurs when a thread is handling a new connection, and it makes sense that we have many such events when we aren't pooling our database connections with the RDS proxy. So mysqld will be busy creating threads to handle incoming new client connections. Thus, the event io/socket/sql/client_connection slows down the process of servicing new client connection requests since other database connections will be waiting for the thread to be assigned.
Conclusion
RDS proxy can make your applications more scalable, resilient, and secure.
Applications' scalability is improved when they share a pool of database connections. For example, an instance using an RDS proxy can scale better than one, not managing database connections.
Resilience is achieved by a proxy connecting to a standby Database when there is a failure.
Using IAM authentication and retrieving credentials from AWS Secrets Manager improves the security of your database. These credentials can be automatically rotated as AWS Secrets Manager supports that functionality out of the box.
RDS proxy can be handy in serverless applications which support highly variable workloads. For example, the variable workloads may attempt to open a burst of new database connections.